3D printing BIG and high quality, who would have guessed?
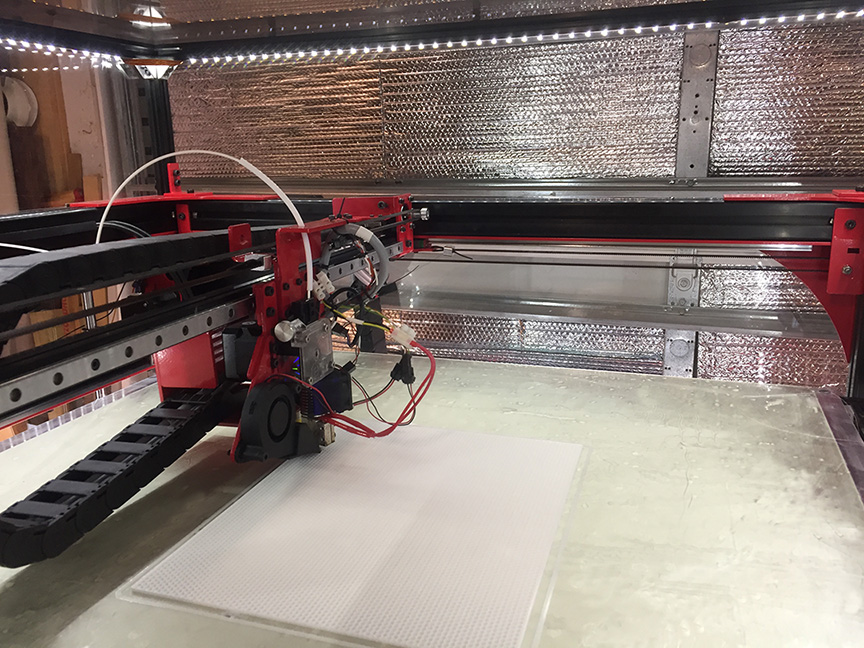
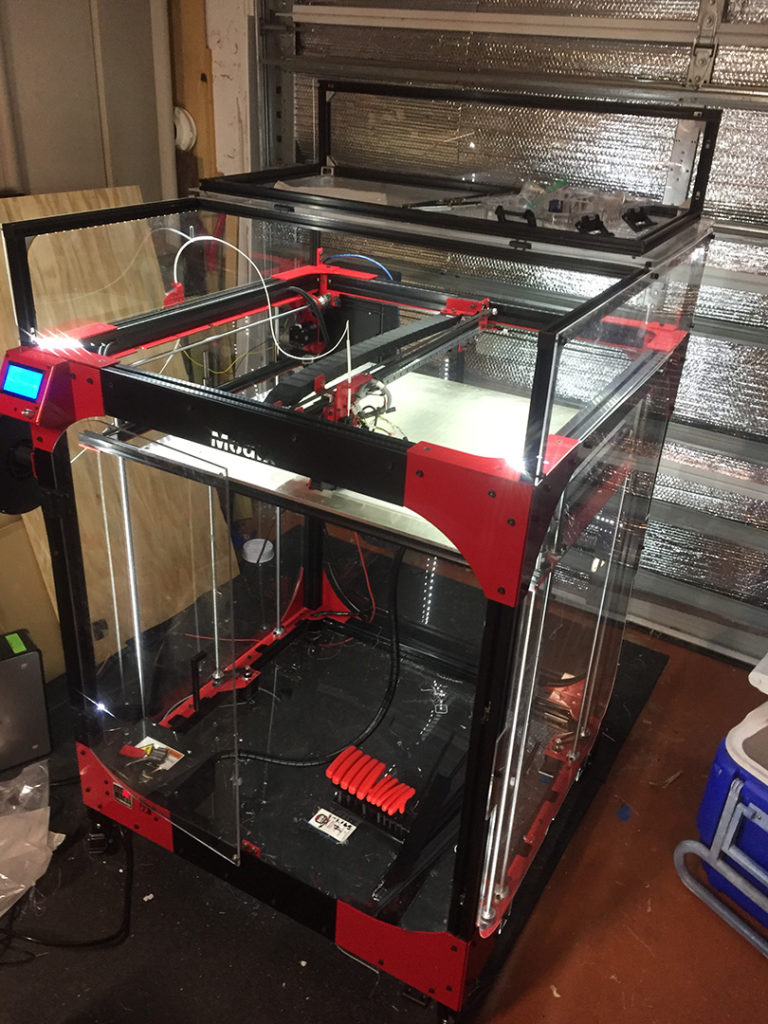
The newest addition to my fleet of 3D printers is the Modix Big-60. There’s not a lot of external support for the machine, so I thought I’d add a page to my site to cover some of the things I’ve found about this incredible printer. This is an early write-up, so I’m not really publishing it yet. I just wanted to get down my notes. It’s a BIG printer. That means BIG things to work with. I don’t write reviews for reviews sake. I am an artist who has serious production schedules. I bought this machine to make big art to satisfy my client’s needs.
Initial thoughts
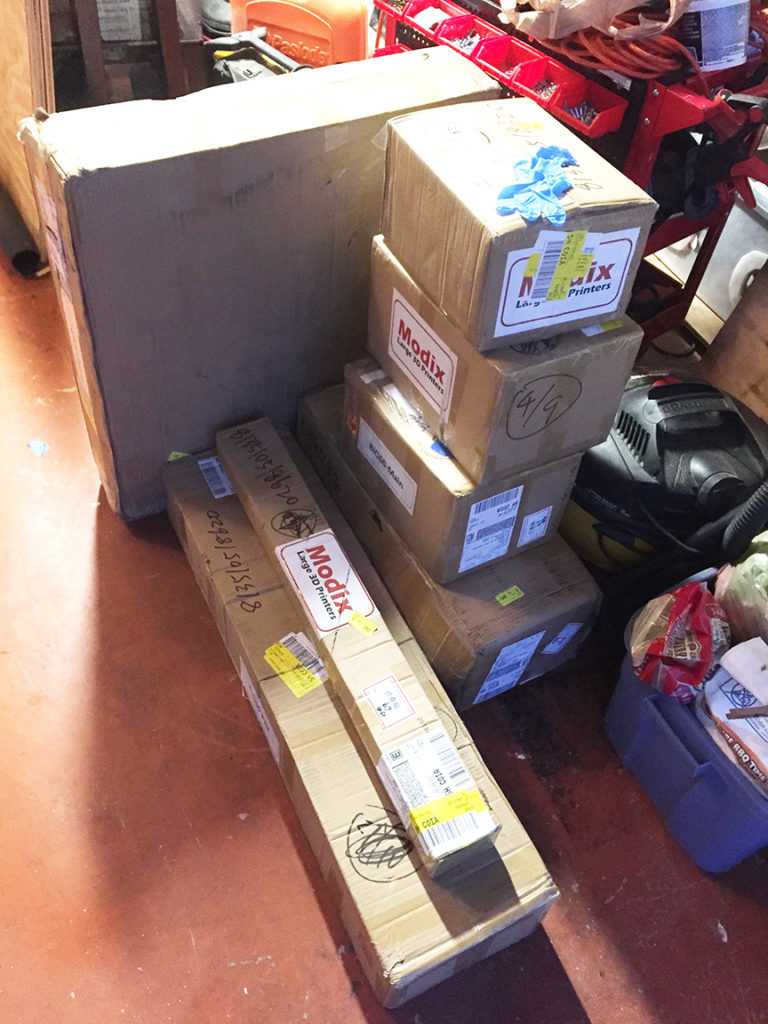
The printer had the specs I needed for several upcoming large projects. I had read enough reviews to have a fair idea of what was coming, a pile of boxes, a possibly questionable assembly guide, and some time focus on it for calibration. Every one of my expectations was met. But this wasn’t a simple unboxing of a project. This is a kit printer with 1,000 parts. It had to be built from the ground up, every motor, every screw, every pulley.
And that’s just fine. I’m just the kind of guy who loves to assemble a grill, dishwasher, and on a good day, a disc brake.
The key to unboxing is to find a room you can take over, possibly for the next month, unless you have a solid block of time to put into construction. Also, the printer needs to be built in the room it can fit in. I would have loved to be able to be able to build my Modix in my studio. But my studio is in the middle of my house. And my wife doesn’t like the constant noise from my printers. So the printer needed to live in my shop, as my doors wouldn’t be big enough to move the printer to move out to my shop. So the printer needed to be built in my shop. Just to be clear, I started with one printer in my studio. No problem. When I got to six printers, running all the time, it was time to be exiled. At one point I hit 13 printers in my shop, and it was plenty noisy on a high-volume day.
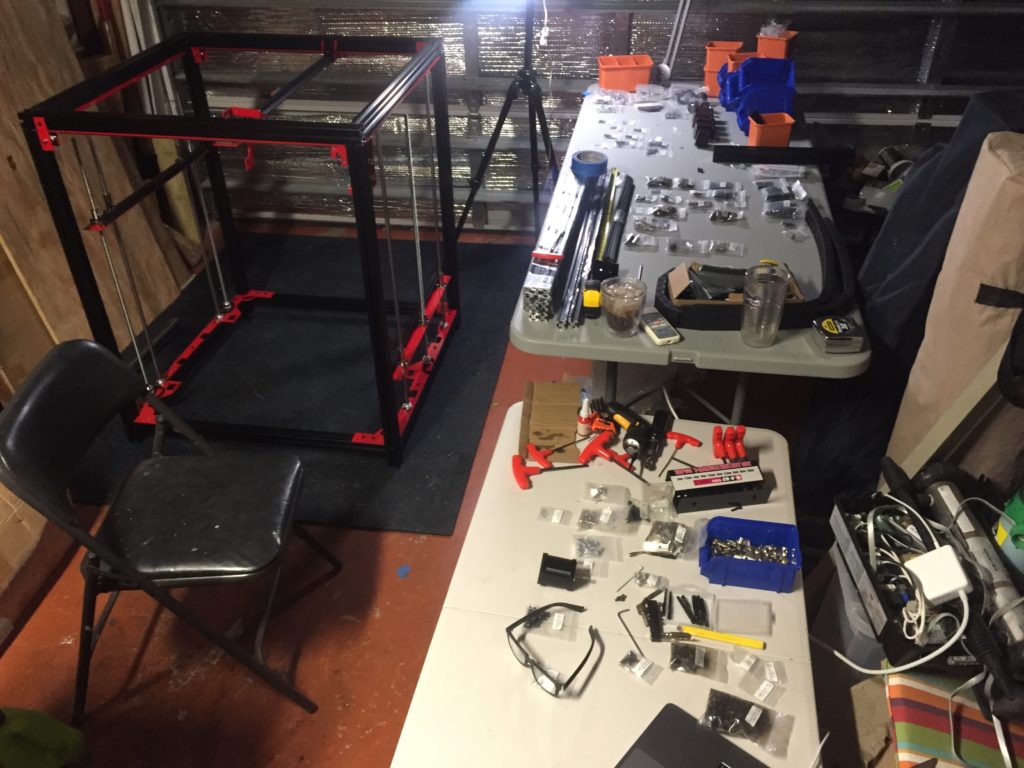
I decided to build my printer in my garage and move it to my shop later. I live in Florida, and it was Spring/Summer, so I insulated my garage door and set up a 6500 btu AC unit in my garage to augment my 5000 btu AC in my garage shop unit. I was going to need every BTU in the hottest Summer we’ve had.
My setup was going to need 3 things initially, a table for the parts, a table for construction of the parts, and a floor mat for the build. I had two folding tables for the parts and the parts build. Their previous lives were either the bar during parties, or trade-show foundations for monitors. They had no complaints, but this wasn’t their highlights, I suspect. For the floor I bought a couple boxes of ‘jigsaw’ type padded floor pads from Home Depot. I started with one box, but it only left a couple inches on the sides, and I planned to rotate my build, so I bought a second box.
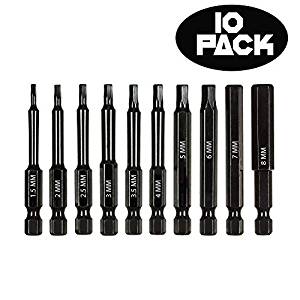
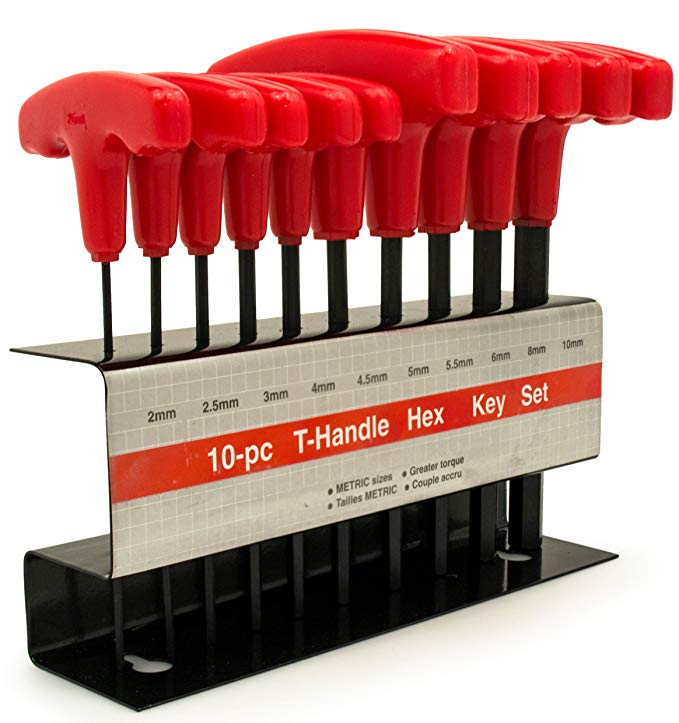
The printer comes with a hex set, but I bought two additional hex improvements, a hand-held screwdriver, a set of hex drivers to go with it, and a hand-held hex driver set.
https://www.amazon.com/gp/product/B07G6RX35J/ref=ppx_yo_dt_b_search_asin_title?ie=UTF8&psc=1

https://www.amazon.com/gp/product/B07DQ9LC8Q/ref=ppx_yo_dt_b_search_asin_title?ie=UTF8&psc=1
https://www.amazon.com/gp/product/B01HN0AZD6/ref=ppx_yo_dt_b_search_asin_title?ie=UTF8&psc=1
You absolutely could live with the tools that came with it, but I have arthritis, and these tools made assembly MUCH, MUCH easier.
I can’t say enough about a well lit construction area. I ended up running my photography lights all over the place so I could see all the details during construction. If you don’t have a brightly lit area, plan accordingly.
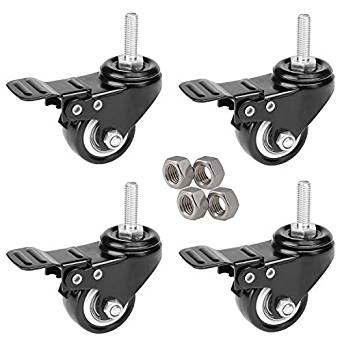
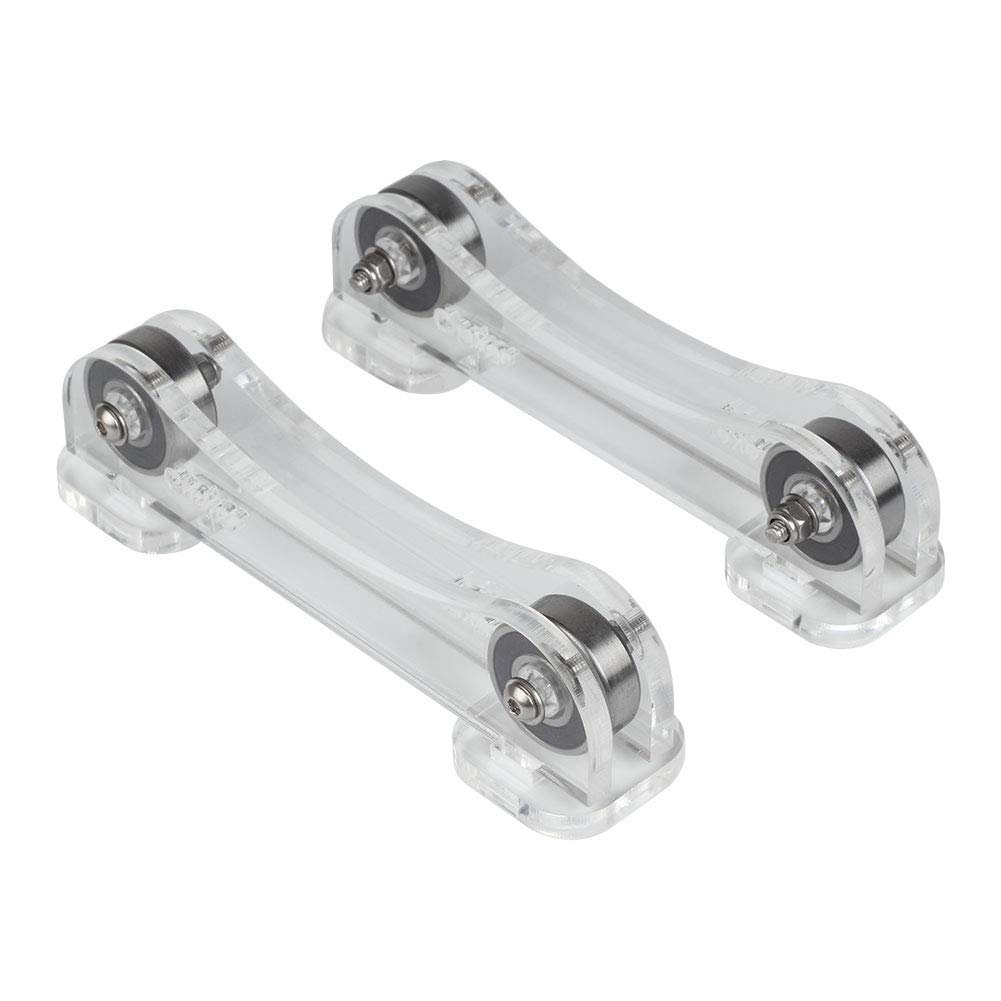
I also picked up a tip from the ‘Eco-Extruder’ Brendan, who suggested these locking wheels. I loved them. They helped with construction, and when it came to messing with computer stuff, I could spin the whole unit with no problem. When I locked down the unit, these wheels were solid. I’ve been printing high resolution prints for weeks now, with no indication of any X or Y shift due to these.
https://www.amazon.com/gp/product/B07597TSHK/ref=ppx_yo_dt_b_asin_title_o08_s00?ie=UTF8&psc=1
It may be obvious to say, but pay attention to the directions. I’m very familiar with 3D printers, and sometimes I got ahead of myself, only to find that I had to blow half an evening back-tracking two times to do thing correctly. Check twice, then look at the 3D VR model. Then think “why would this be done this way? A couple times, I don’t think it was me that was in error.
One IMPORTANT note here, that is completely obvious, unless you don’t do it. TIGHTEN EVERYTHING. I left a couple key pulleys loose till I tightened the belts, then forgot about them. After tightening your belts, TIGHTEN the pulleys. Seems obvious. But when you’re dealing with 100 other things, this one obvious one is a show-stopper down the road.
Mounting the nozzle properly
I didn’t follow the nozzle install instructions exactly, and I had a serious block-ooze problem on my first print. When assembling the head, screw the nozzle in all the way snugly. Then back-off on quarter turn. Then screw in the heat-block throat all the way up against the nozzle. THEN tighten down on the nozzle till it seats. This way there is no gap inside the block between the throat and nozzle. The instructions cover this, but I got lost in the assembly and didn’t do this step.
Once you’ve done you’re build, you calibrate. Always do the tilt adjustment three times. There are two ways to calibrate your bed level. Both are supplied. One uses the Touch system, where a probe actually touches the bed and sends out a signal. The other is via an inductive sensor that sends a signal when it’s about 3mm above the bed. I went with the inductive, with the Touch as my backup plan. I had heard it was more accurate.
After several failed attempts, I found the bracket holding my induction sensor was slightly bent. I tweaked it with some pliers, and then bingo, I was off to the races. I installed the latest firmware, followed the calibration guide and I was good to go. I haven’t had to re-level the bed since the first time, but I have tweaked the ‘Verify Z Height’ on occasion, using a sheet of inkjet printer paper (20#). I fine-tune my prints on the fly when needed.
Preparing the bed
I had never printed on PEI before, so I killed my bed pretty quickly. But it’s a huge print area, so I kept moving my print area around the areas I had gouged. Even before I began, I ordered two new PEI sheets from CSHyde, and I’m glad I did. They were thinner than the one that shipped with the printer, but that’s fine. Laying them down is another story. STORY HERE FOR FUTURE.
To remove my damaged bed, I brought the bed up to 79c and used my Husky Heavy Duty 3″ Bent Scraper (Home Depot). This used to be my go-to tool for removing large prints, before I got my BuildTak spatula (more on that later). This tool is still great for cleaning up after prints. I bought some 3M adhesive remover in a spray can from a local auto shop, but I didn’t need it. All of the remaining adhesive came up with isopropal alcohol.

My initial prints had a problem with sticking, so I scuffed the surface with 320 grit (US) sandpaper and wiped it down with isopropal alcohol. It works fine now. For PLA I haven’t been heating the bed. I tried going to 60c when I initially had problems getting the first layer to stick, but it didn’t make any difference. I print PLA just fine with no bed heat.
So my ‘toolkit’ for prep (items to always have on hand) is:
• A sheet of 320 grit sandpaper
• A bottle of isopropal alcohol
• A roll of paper town to wipe down the bed
• Heavy duty bent scraper for initial bed clean-up
• A tool to cut filament. I used my small angled snips from my resin printer. I like tools that cut like pincers, not light scissors. This gives me a flat cut for putting into the extruder.
I use BuildTak on my other printers, so once I get this printer 100% figured out, I’ll put down my BuildTak. At $90, I don’t want to destroy it too quickly. You need to order it from the company, as they don’t stock 24″x24″ on Amazon.
https://www.buildtak.com/product/buildtak-3d-printing-surface/
Printer settings
I’m a Simplify3D fanatic. When I got into 3D printing 6 years ago, I was met with failure after failure. Then I bought Simplify3D. And overnight, everything changed. Everything I printed, printed. I was sold. So when I learned about the Modix Big-60, I was interested, but once I heard they had a Simplify3D profile, I was in.
First Build
My initial ‘stock’ settings were based off the provided Simplify 3D profile. Pretty much 0.4 nozzle, .20 layer height, 50mm/sec speed, first layer half height, half speed, no fan. Fan at 100 after first layer.
One you have everything done, all thing calibrated, and you’re ready to dive in, there’s a few things I might suggest.
Keep a sheet of paper around. Yes, they have their calibration thing, and their suggestion of a business card. But we still print at the thickness (to start off with) at a sheet of paper.
When you hit “print from CD” the first thing you should do is quickly hit the “TUNE” selection, and scroll to “Adjust the Z” and select it. If you are air-printing, you are lucky. Counter-clockwise rotation will bring up the bed. If you are grinding into the bed, this the restart button, quickly.
I print with a BIG brim. Three shells, separated from the model. I wait till I nail the brim using the Tune. With a sheet of paper in my right hand, which I keep moving, I adjust the Z. Counter-Clockwise: Up. Clockwise: Down. I move my paper till it catches. Then I print, and try to move the line of print. If doesn’t hold to the bed, I go up (counter-clockwise). If it is not printing anything, but leaving a clear path, I go clock-wise to drop the bed.
I print a 5 skirt outlines, offset from the print my 5mm. After a couple rounds, I pick at the skirt. If it easily comes off the bed, I turn the dial clockwise about a quarter turn, wait a bit, and try again. I always want to start too high instead of too low. But if your print is too high, it will either curl up on the edge, or simply fall over at some point.
Once the print is running, and I’m happy with the Z setting, set your Z (scroll down and you’ll see it), or if you hit Reset, you will lose your adjustment.
Slicing Software
The printer support page comes with links to Slic3r and Cura, open source slicing software, as well as profiles for Slic3r, Cura and Simplify3D. I’ve been a huge fan of Simplify3D and find the expense of $149 well worth it.
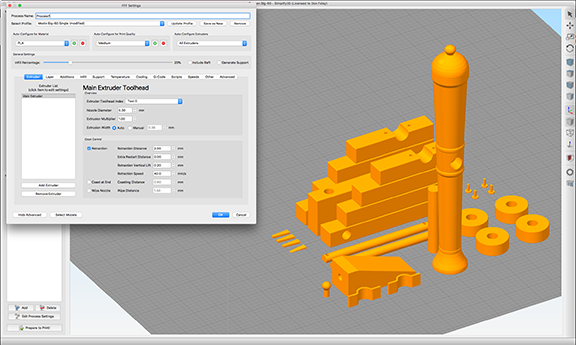
I started with their supplied profile, but it didn’t take long for me to start messing with the initial settings. Once I was getting solid prints, I switched to the .3 nozzle and made further adjustments until I was printing out what could be called ‘silky.’
I model in Lightwave 3D 2019 and ZBrush 2020. Moving models from LW to ZB is easy, I tend to just save as STL in LW and import the file to ZB using the ZPlugin, 3D Print Hub. Sometimes if I’m having issues, I’ll send the file to AutoDesk’s NetFabb, a free online model-repair service.
https://service.netfabb.com/login.php
The resulting ‘fixed’ file is an STL file. Usually the repairs go very well, but double-check the results. The STL file is then imported into Simplify3D.
In theory, you could print directly from inside Simplify 3D via USB to the printer, but I never do this, for 2 reasons. #1, All my printers are in my shop, not my studio. #2, I know I would accidentally close my program while it was running, or I would have a rare computer crash right at the end of a long print.
Thus, I use SneakerNet (in my case, BareFootNet) to move an SD card from my reader to the printer. Considering that most prints take days to run, this isn’t really a show-stopper.
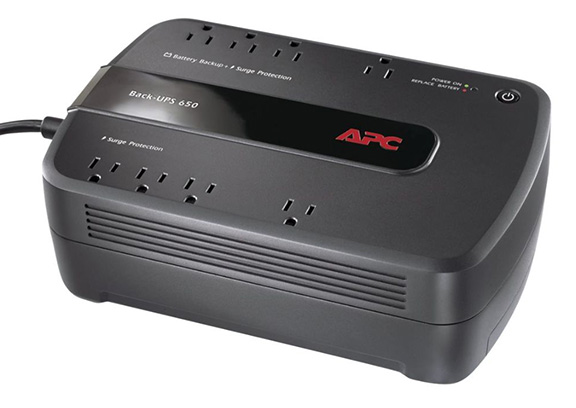
UPS
One of the most important upgrades you can get is an unituruped power supply, or UPS. I live in Florida where we often have short outages for a second or two, certainly during the powerful thunderstorms we get. My APC 700 does a fine job handling short outages. The printer only draws about 60-70 watts, so it could actually print for a long time. My heater is plugged in directly to the wall, a short outage wouldn’t effect the temperature much, if at all.
I picked mine up at Home Depot. It also provides surge protection, which is equally important. The 550 Watt version runs around $70 and would be fine.
Lighting
I picked up this $14 light strip on Amazon, fantastic upgrade.
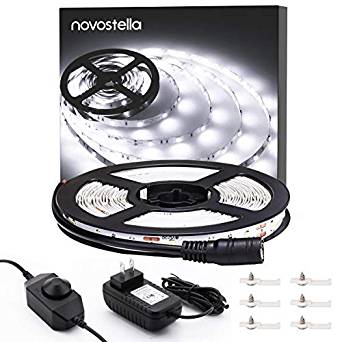
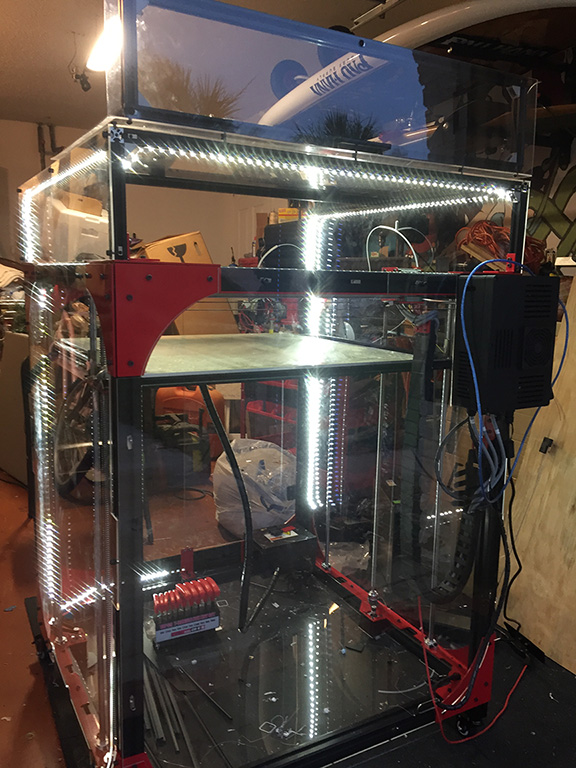
I ran it up on the bottom left (near bed heat power supply), up to the enclosure, to the back, the back side, the right side of the enclosure and down to the base. This changed all my lighting issues. Changing heads and filament is no issue.
PTFE Change
My .4 nozzle prints at 2.0 were all printing great. I did notice some striations, oddly enough only right side of the model. My spool is mounted on the left, near the control panel. Watching the print, I saw the filament and PTFE tube from the sensor was really tugging hard on the prints as they went to the right. I had seen videos of other Big-60 printers where they cut down the PTFE so it was only in critical areas.
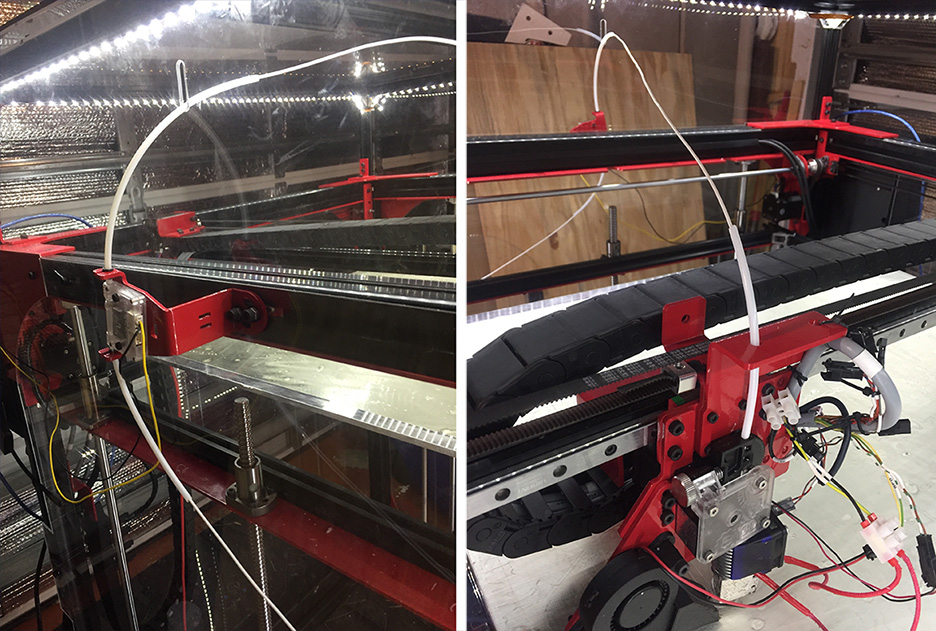
So I cut mine down. 3″ going into the sensor, 6″ going out of the sensor and through the slot in the enclosure, then 3″ above the extruder. This greatly reduced the friction on the filament and solved the problem.
I originally cut up some of my PTFE I had laying around, but I noticed the walls were much thicker, by 1mm than what came from Modix. So, I chopped up the Modix tube, as it presented less friction.
New Spatula
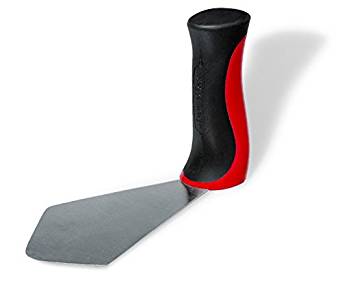
Like many, I’ve been using a variety of putty knives over the years to remove my prints from the bed. But with larger prints, I wanted to find a bigger, better, thinner solution. In my exploration I came across BuildTak’s purpose-built spatula. It’s the only tool I use to remove prints now.
I’m finding on big prints it’s good to have a hot bed to remove prints. So if you shut off your heater after getting good initial layers (as some people do), you may want to crank it back up to 60 before pulling off the print. This is where the WYZE plug comes in handy if you’re not near your printer. More on that later.
Nozzles
I began using the stock 0.4 brass nozzle that came with the machine. I had ordered a hardened steel nozzle when I was assembling the machine, so after I re-built the head to clean up my mess from not initially bedding the nozzle/throat, I installed the steel nozzle and it printed all my initial prints perfectly.
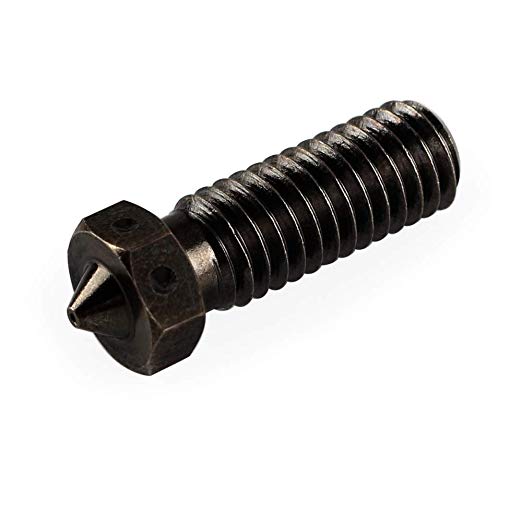
https://www.amazon.com/gp/product/B07RXQ2JK3/ref=ppx_yo_dt_b_search_asin_title?ie=UTF8&psc=1
After I felt I had a solid grip on getting successful prints from the machine, I wanted to start tests with a 0.3 nozzle. I would be printing very flat items for a client in the near future, so I wanted to have to tightest top layers I could print. I bought a pack of 0.3, set my layer to .10, increased my extrusion multiplier slightly to 1.05 and reduced my speed to 30mm/sec.
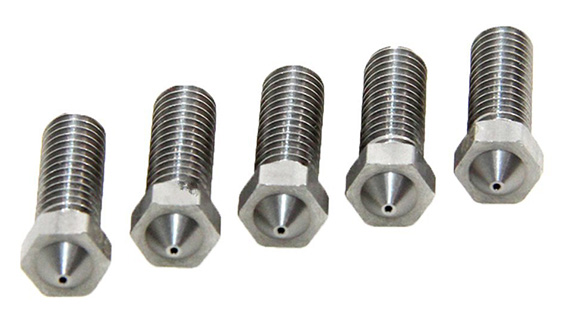
https://www.amazon.com/gp/product/B07G4WDRM7/ref=ppx_yo_dt_b_search_asin_title?ie=UTF8&psc=1
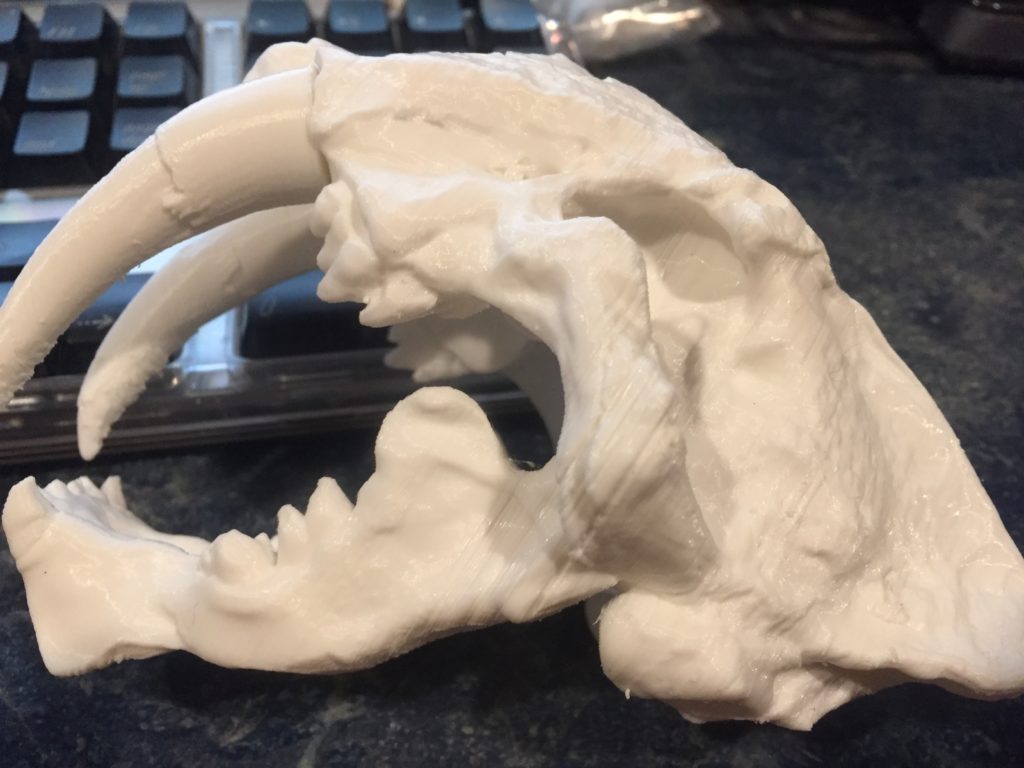
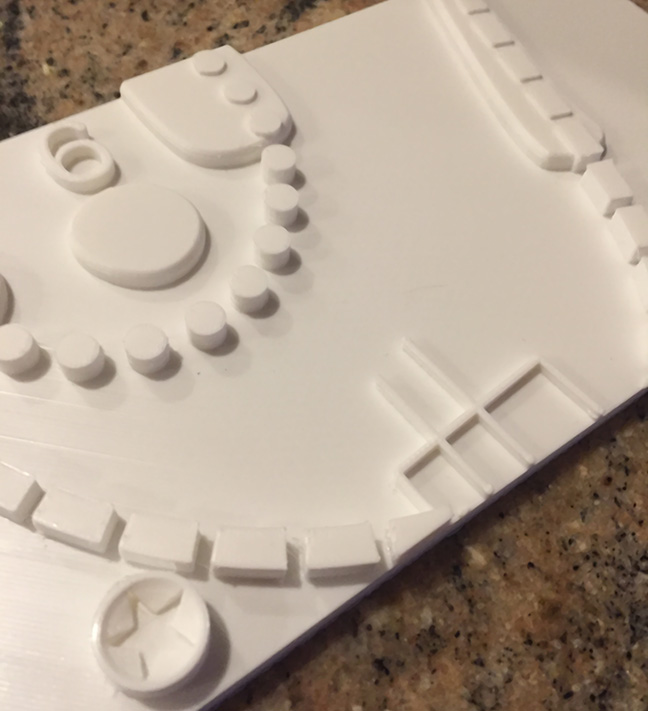
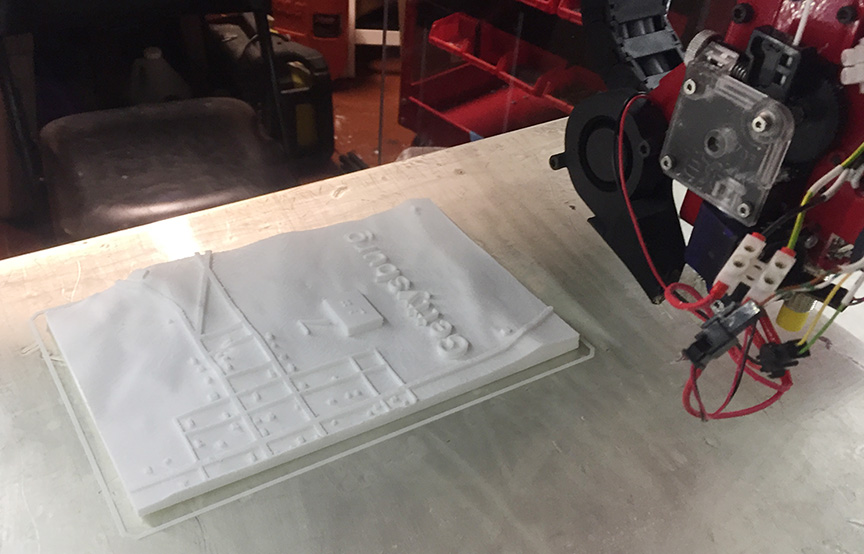
The result was a perfect, silky-smooth flat top layer, exactly what I had bought this machine for. The 16″ wide, 4″ deep and 1/2″ tall piece took 32 hours to print, but the wait is worth the quality. The final piece will take a week to print with current settings, but speed isn’t important. This machine isn’t here to make huge wild creations, it’s to make large low profile 3D maps for a client. So that’s my focus. What would take me eight pieces to glue together for a map, now can be done in one piece. And with higher quality.
Big prints will need LOTS of filament
I bought the Modix Big-60 because I had a client that would need several big prints. I have had many projects with this client and expect many more. So the investment was easy. While they are large, in format, they aren’t tall. Even so, Shapeways wanted $1,500 for a 16″x20″x 1/5″ print. I’ve used Shapeways for other projects, but at this price I wanted to explore my options. At a minimum, I thought, the Modix Big-60 would give me full sized proofs. But with the .30 nozzle at 0.1 print height, I’m getting the same print quality as Shapeways.
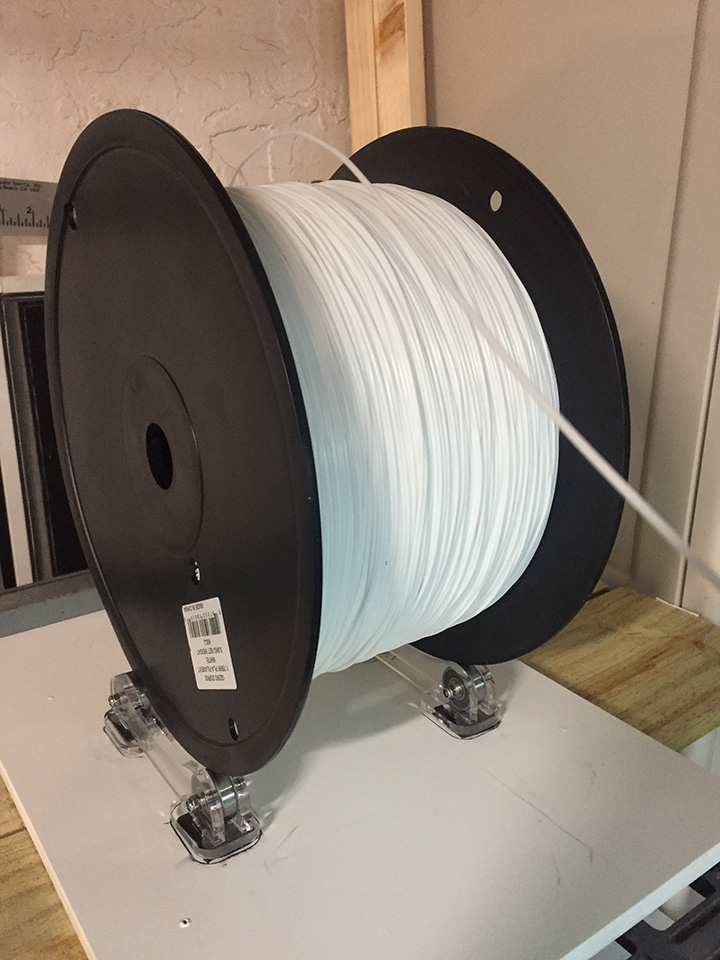
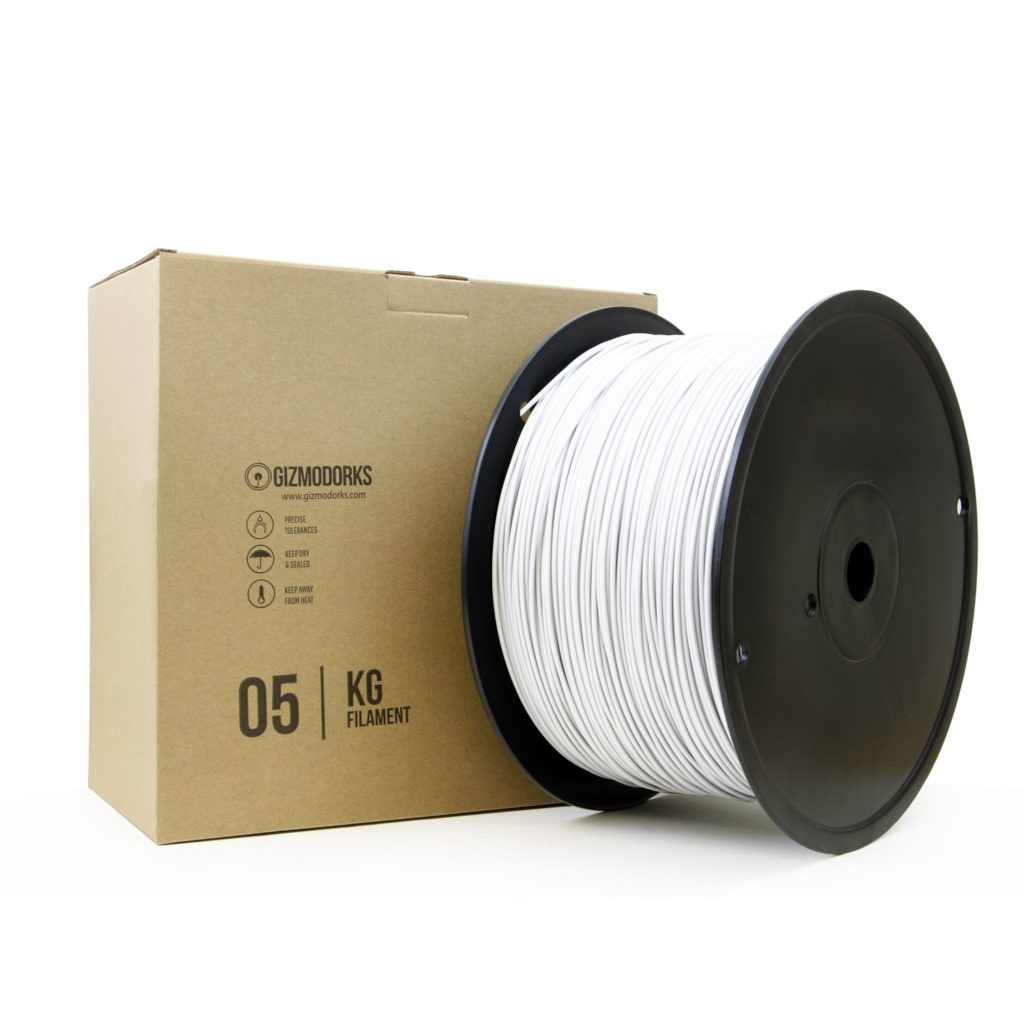
First off is the filament. I tested their product before I bought big, and thus I got the 5k spool of Gizmo Dorks. I was hoping for some kind of bulk discount, but nope, about the same as buying 5 spools. The goal here, though, was to not have to keep changing spools all the time. My final product will be cast in bronze, so I don’t care about the color.
https://www.amazon.com/gp/product/B074WGLQ7W/ref=ppx_yo_dt_b_asin_title_o06_s00?ie=UTF8&psc=1
And I needed something to help me NOT go back to my days of ‘tugging’ on the spool, thus ruining my prints. I tried to build my own bearing based system, but wasn’t happy with the results. Then I came across this for $17….
https://www.amazon.com/gp/product/B01FJ9LUO6/ref=ppx_yo_dt_b_asin_title_o01_s00?ie=UTF8&psc=1
And so far, it works great.
Spool Covering
I live in Florida. It is always humid, and my shop has had up to 14 printers, so trust me, I know what humidity does to 3D PLA filament. I actually designed a really cool spool cover…but once I looked at the print times (about a week) I knew I needed to go another route…for a while. So I went to Walmart with my measurements and bought a box that would cover my spool, upside-down, perfectly. First, I built a box liner out of PVC stock that would allow a snug fit. In the photo you’ll see the silicon-gel de-humidifier on the bottom.

Then I took my store-bought box, lined the bottom with a rubber weather strip I had laying around the shop, poked a hole through for my PTFE tube (which I glue-gunned into position) and I was all set.
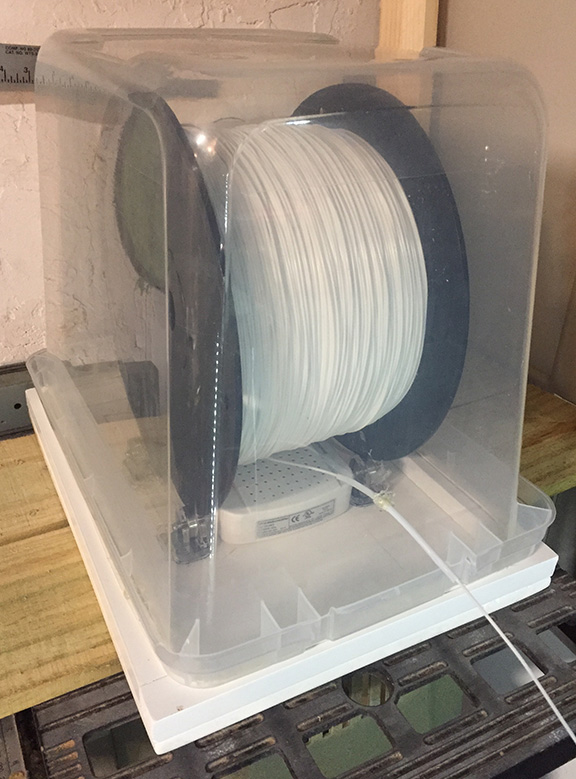
When the crystals in the de-humidifier change color, I can plug it into a socket for 10 hours to dry out, then toss it back into my spool-midifier again. In theory, it’s good for 100 recharges, not bad for $14.

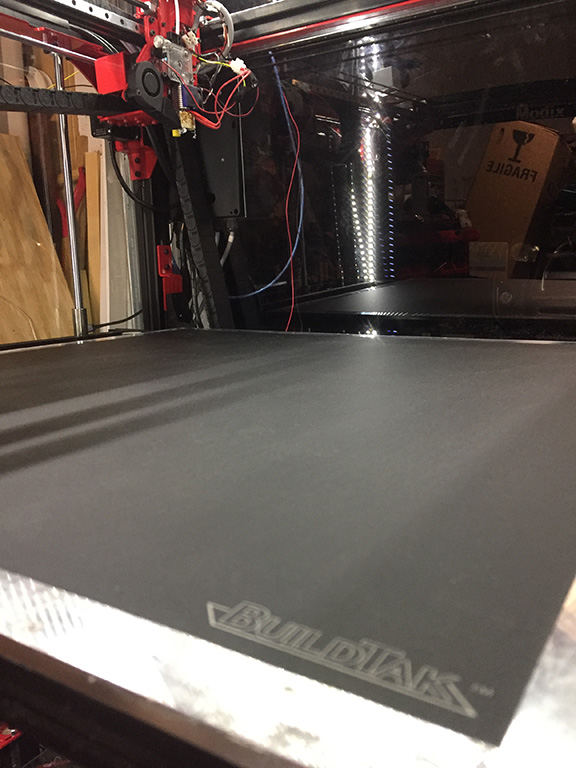
BuildTak
I destroyed two PEI sheets and have decided to go back to my old standard, the BuildTak beds. They are pricey for this machine, about $85, and since 2’x2′ isn’t a standard size, you can’t order them (yet) off Amazon. So add shipping to that. But I use BuildTak on all my other machines, so I’m used to it.
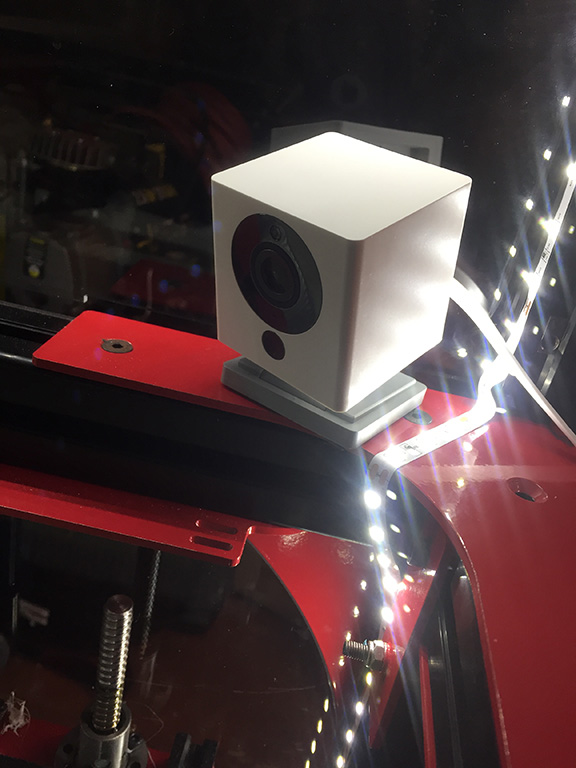
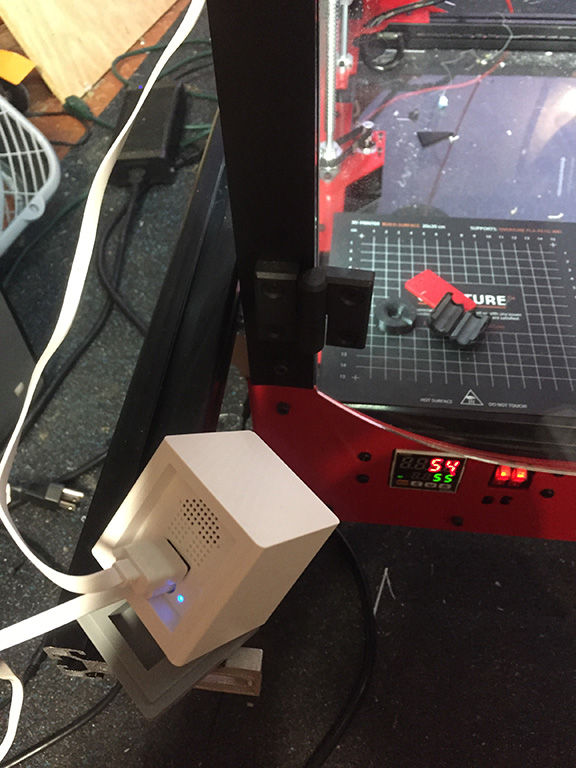
WYZE Camera
I’ve been using old LogiTec wired cameras for my printers in the past, but this printer isn’t currently near my shop computer, so I decided to splurge and spend the whole $25 for a wireless web cam. I decided on the WYZE based on reviews. I wanted to be able to check my print from my phone or iPad at any time, anywhere, not just locally. I put a tab of double-sided foam tape on the bottom and it works GREAT! 1080 resolution and a host of features I’ll never use. I set up a second one to watch my filament spool.
Plugs
The print’s I’ll be running in the near future will take weeks to run. I’m setting all of this up so I can monitor, and if needed, stop a print. To that end, I have 2 WYZE plugs controlled by the same App, one for the printer, one for the heater.
https://www.amazon.com/gp/product/B076H3SRXG/ref=ppx_yo_dt_b_asin_title_o03_s00?ie=UTF8&psc=1
Fun Real World Test
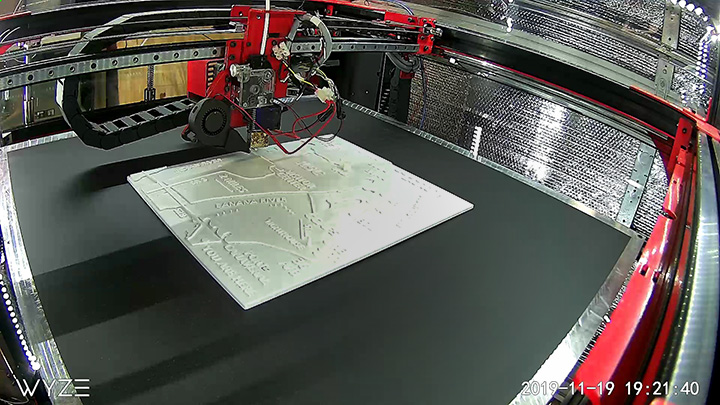
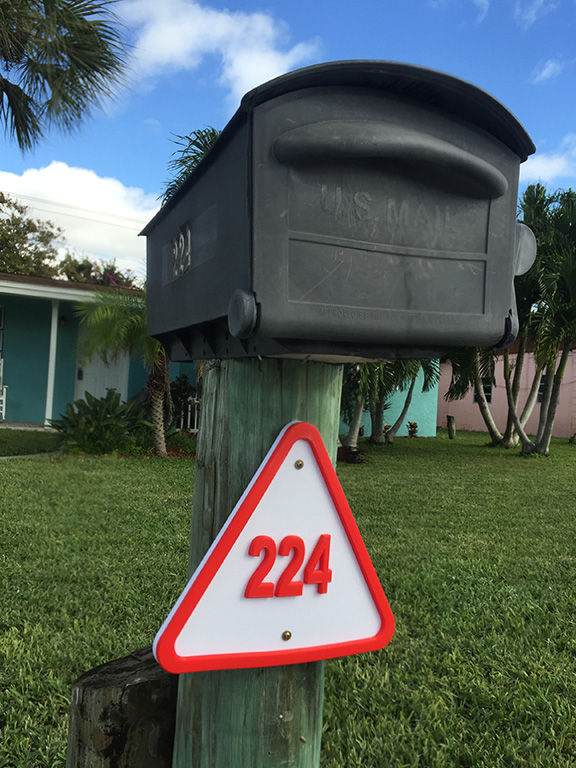
I needed a new ‘Channel Marker’ mailbox number for a house we own, so I cranked out a quick two-color test this weekend. 12 hour print at .1 height and the .3 nozzle at 30mm/sec. I switched from the white PLA to a red PLA in the last few hours to get the two-color effect. And yes, the screw holes were simple subtraction booleans.
HeaterCam
I wanted to be able to monitor my heater, and my WYZE plug for the heater, so I put a second WYZE cam into play. This way I can make sure the plug controller is OK, and how the bed temp is. I actually use this often, shutting off the bed heater remotely when a print is done.
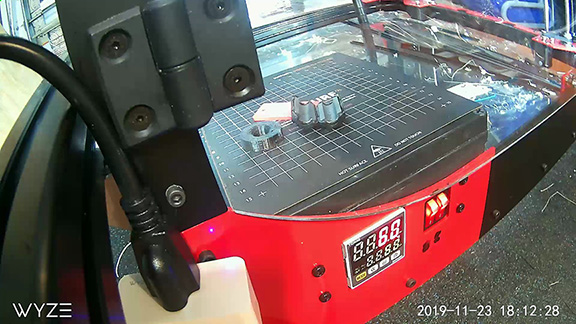
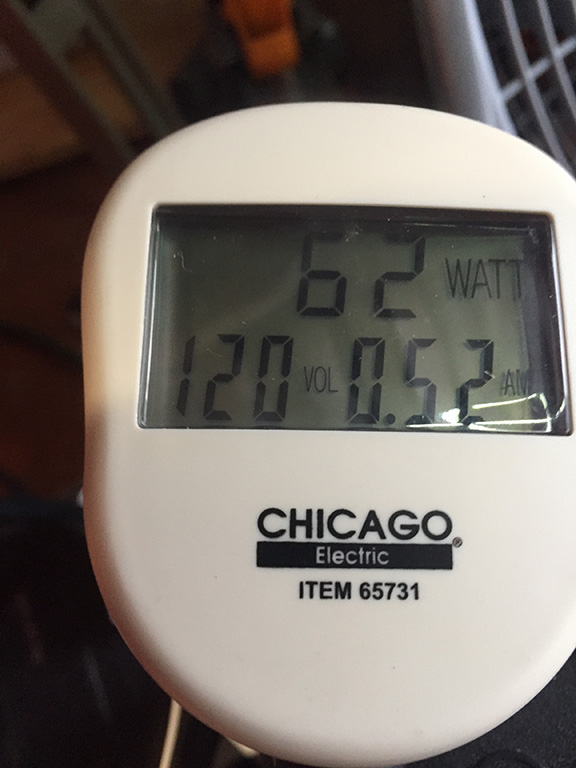
Amps and Watts
Usually I don’t care how much current my printers draw, I have a UPS that handles the printer, and the heater is on a separate circuit. But with the new WYZE plugs, I wanted to make sure I wasn’t drawing too much on the lines. The printer uses the same amount as my smaller printers, which makes sense. A 40W head heater and stepper motors are the same configuration, so the printer on FULL BORE is drawing 60ish watts.
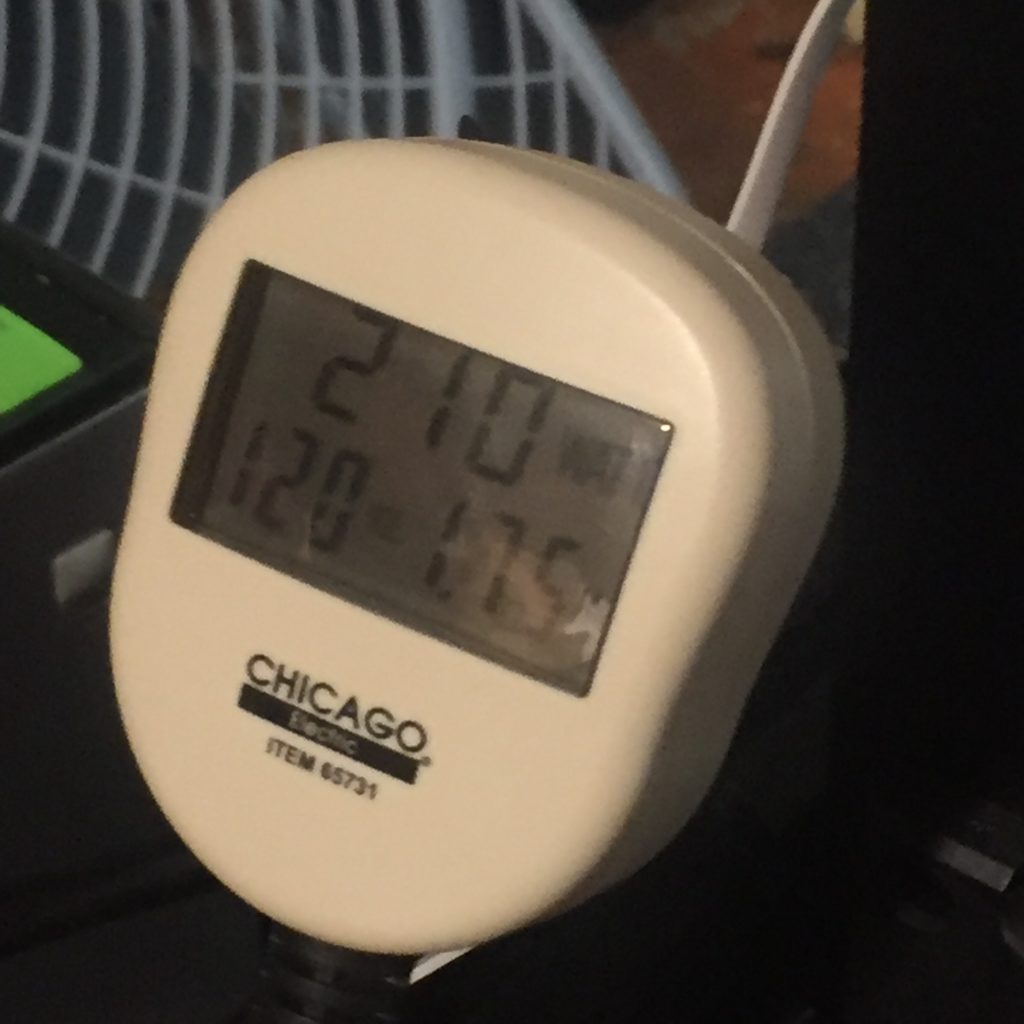
Power reader on the Modix Big-60
The heater drew much less than I thought it would. With both the inside and outside heaters turned on, it drew only 1.75 Amps, or 210 Watts. So, just over the energy use of two 100 Watt light bulbs.
BL Touch Upgrade
I’ve been very happy with my prints, but on my VERY large, VERY flat prints, I’m finding spots that dig in too hard, or print too light. So one corner is lifting off the bed during printing, and another spot is printing too close, causing issues when trying to remove the print from the bed. Bottom line is that I didn’t feel the bed leveling was as good as it could be. The folks at Modix already told me that BL Touch sensor was better. It is included with the printer, so why they don’t make that the primary on construction, I don’t know. I also saw that when I put on my BuildTak surface, I had to re-calibrate, because with the induction sensor, there was some ‘blocking’ of the signal because of the material.
So, I installed the BL touch. Make sure to use the new connectors (3 and 2 wire) and not the old ones. Install the Marlin firmware for the BL touch. And re-wire the main box. Here is a link to the re-wire.
http://www.support.modix3d.com/bltouch-sensor/
After doing this, I ran through the calibration steps from scratch. Remember, you NEED to do the tilt balance at LEAST twice. Keep doing it until a piece of paper (20#) slides, but catches equally on all 3 points. You’ll be changing the Z during the ‘Tune” part, but it’s key to get all points nailed during the Tilt phase.
Then when you do your print, go to Tune, and adjust the Z as needed. Then store the savings one you have it nailed. After that, you’re solid. So far I am indeed finding that the BL Touch gives me a much better bed level mesh.
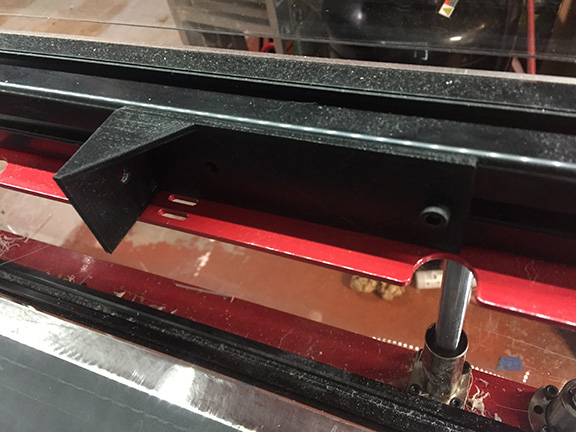
Fan ducting 2.0
When I first began printing, my fan duct on my main extruder took a bit of a beating. My fault. But I kept it, as it didn’t mess with my printing. For months. The front had melted and deformed a bit, but it worked.
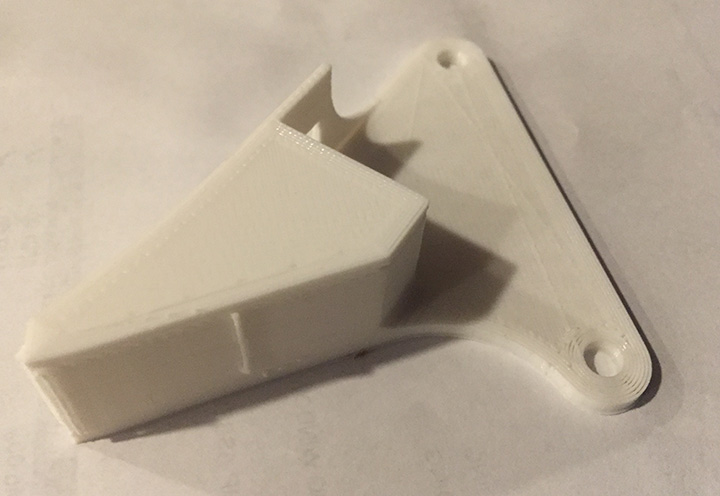
Fast forward to last night I set up another huge print. The last one of the same nature took 9 days. Came out mostly great. I woke up, as I am wont to do, around 3 am. I checked my print on my iPad. Huge failure, so I shut it down via my WAYZ app. Turns out that my print failed, the glob of filament grabbed my factory fan duct and tore it apart. Then my printer head overheated and shut off the works.
In the morning I decided, for kicks, to try to print a new fan duct on my failed printer. Mostly to confirm the system failed due to the duct, and nothing else. It printed great for about 30 minutes (yay printer) and then over-heated. This confirmed the problem.
So I printed a new duct on one of my other printers in about 2 hours. The STL file is available on the Modix site. I put it in place and began my huge print again. All is well. Perhaps a piece that is very sensitive to heat shouldn’t be placed as close to the major heat source. But, at the moment, my printer is churning along, hopefully for the next 9 days.
Lessons learned? Fix the problem before it becomes a problem. Also, don’t print this with internal fill at 30%. Just print it solid. My first print looked great, but when I went to remove the supports, it crumbled. Print at 100%, and it won’t take much longer. I just used my default setting for ‘great prints’. I got through the moment, but I absolutely will be re-printing this much tighter on my Modix in the future.
The X Factor
I will admit that I’m an early user, and have not lubricated anything. On most of my printers, they want lubrication after 500 hours or so. So, lubrication is not on the top of my ‘things-to-do’ list. It should be.
Thus my latest note….Grease it down Baby!
I’ve been print HUGE, LONG prints. And everything has been going well, considering this is a VERY new machine. And then my X began acting up again. I checked the pulley. It was fine. I was having a HUGE slip on my X axis. So I shut down the machine. When I ran the X back and forth by hand, there was a LOT of tension in the middle. It was bugging up. I disconnected the pulley to the motor. Still happened.
The Solution
I did two things. One. I loosed all pulleys on the X. I put in the two calibrators that came with the machine and bolted them down. I forced the the X shaft against the calibrators. I tightened down all the pullies. The X axis MUST be aligned with the framework.
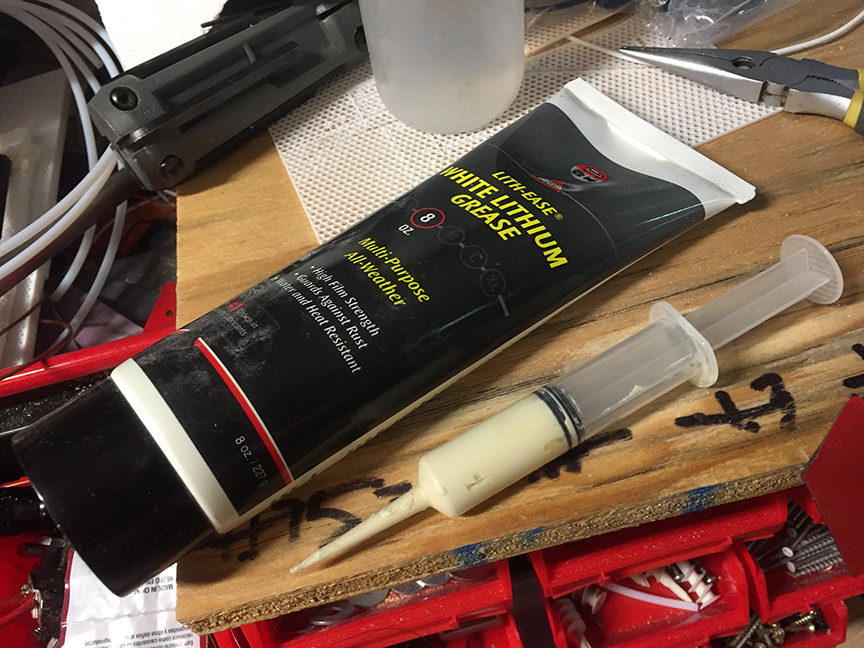
Lubrication
With that done, I bought some White Lithium Grease and lubricated all the tracks, X and Y. Just small dabs. You can buy it anywhere.
The Result
My printer is running perfectly again.
Nozzle Fan Death
One of my big reasons for buying this printer is that I need to do a series of 16″ x 20″ maps. Once printed, they will head off to a bronze foundry for casting. So I’ve been really focused, and happy, on resolution. I’m printing with a .30mm nozzle at 0.75 layer height at 30 mm per second. The results have been tight, and fantastic. The client has been happy.
Then I printed out a test on a big print of my second map. My first turned out great.
It took 11 days, and it sucked. This is a flat map, so other than map elements, it needed to print REALLY flat. But I had buckling all over the place. It almost looked like a topo map. I ran a series of small tests to see if anything changed, including a spool change (5k spool) and I couldn’t figure out why my prints turned south.
I needed a quick small print for another project, so I put it on my Modix, as my other two production printers had clogged heads and I didn’t want to deal with them at the moment. And I watched the print out of boredom.
The fan that directly cools the nozzle wasn’t running. I checked the code, and yup, it should turn on after the first layer. That would absolutely be a top level buckling problem, plus I had puckering on my honeycomb infill, even with 8 top layers.
I couldn’t get a spare from Modix because of the virus, but they told me the type of the fan. I bought this from Amazon…
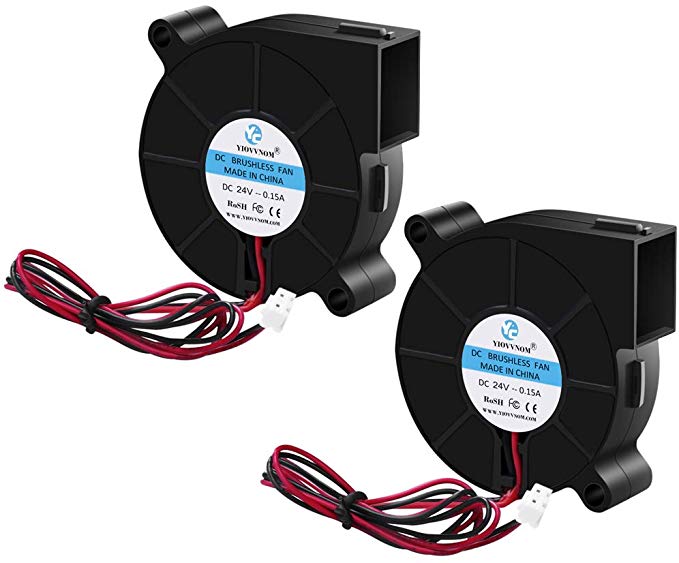
…because it looked right.
The connector wasn’t the same. So I used the connector from the old fan and spliced the black wire to the black wire, and the red to the red, using electrical tape.
And it worked. In the future I’ll re-splice it with something better, I’m running a test print now, but on the second layer, the fan kicked on.
Thinking back on it now, my fan made a lot of ‘chirping’ sounds from day one. Being a new printer, I just assumed this was normal. The new fan, of course, makes no chirping sounds. The lesson being…if you hear chirping from your fan…get a backup replacement. Mine was $12 for a set of two.
Print Fail 2.0
Suddenly, my printer stopped printing well. I had actually been running for a month solid, and was VERY happy I had a great profile for Simplify3D, and a solid bed level. I printed whatever I tossed at it. No adjustments.
Then, that stopped. The first layer was not my smooth line, it was erratic. And then the print failed because there was no solid first layer. Absolutely no change in settings, as I thought I had finally found the perfect setting (.3 nozzle, 1mm height, 30 mm/sec speed, 205 temp…)
I print slow, high resolution.
Since I had rebuilt the head, and the purge looked great, I looked closer. The gear on the extruder didn’t seem to be moving smooth. I decided it was the stepper motor, the stepper driver, or the extruder. Since I don’t do this as a hobby, and time is money and I had deadlines. I bought a new stepper motor and a new extruder on Amazon.
They showed up 2 days later, I installed them and I’m back printing again with no problem. I suspect it was the motor, as I have torn the extruder apart many times, and as I removed it, every thing looked fine. I think the stepper motor wasn’t able to move in small steps anymore. It was fine in large steps, but failed on details. I now have 2 backups.
Here is the Amazon link to the new stepper I installed.
https://www.amazon.com/gp/product/B06XSYP24P/ref=ppx_yo_dt_b_asin_title_o00_s00?ie=UTF8&psc=1